
Christmas tree nails are the easiest way to carry the magic of the holidays right at your fingertips. A tiny painted tree, a sprinkle of glitter, or a bold emerald design can turn an ordinary manicure into a festive statement that works for parties, family photos, and cosy evenings by the fire. Whether you love subtle elegance or full-on sparkle, there is a tree design here for every style and every nail length.
This guide brings together fifteen fresh Christmas tree nail ideas, from minimalist line art to frosted stiletto glamour. Each look is simple enough to recreate at home or to show your nail technician as inspiration, and each one can be adapted with your favourite colours, finishes, and nail shapes. Pick one favourite, or mix a few across your nails for a manicure that feels truly personal this season.
1. Tiny Christmas Tree on an Accent Nail
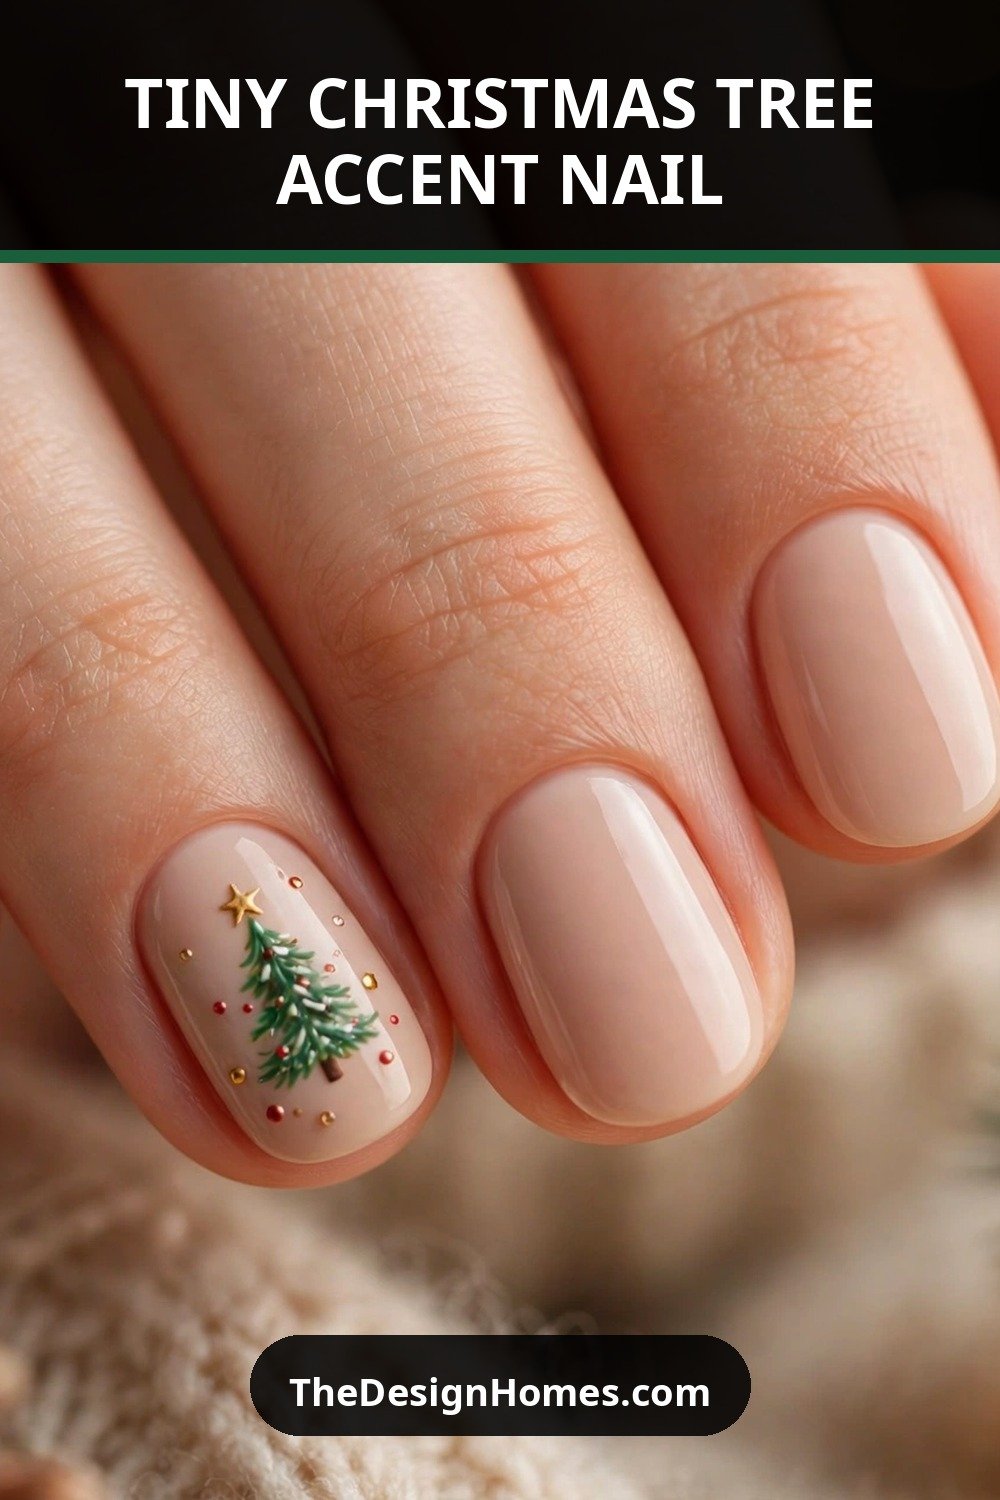
A tiny Christmas tree on a single accent nail is perfect if you love festive nails without going over the top. Keep the rest of your nails in a soft nude, blush, or classic red, then let one ring finger steal the show with a miniature green tree, a gold star, and a few tiny dots for baubles. The contrast makes the design feel deliberate and polished rather than busy.
This look works beautifully on short and medium nails, and it is a great first try if you are new to nail art. Use a fine brush or a toothpick to build the tree in three small triangles, then finish with a glossy top coat. The result is cute, wearable, and easy to pair with any holiday outfit.
2. Green Glitter Christmas Trees
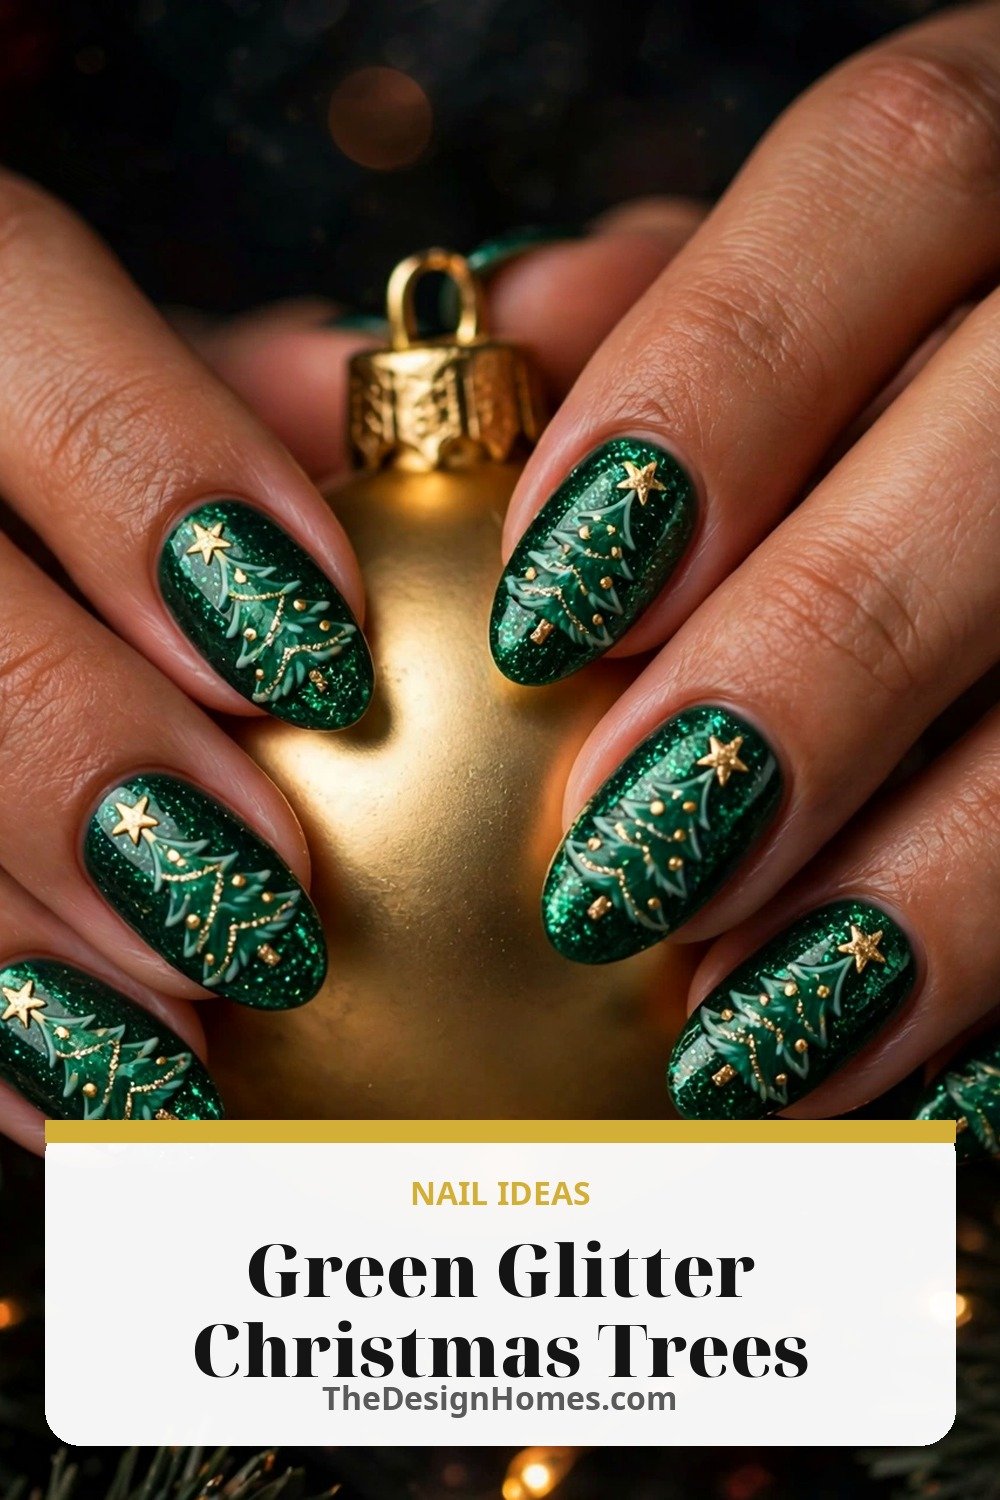
Green glitter trees bring instant party sparkle to your manicure. Start with a deep emerald or forest green base, then paint a glittering tree shape on each nail, or alternate glitter trees with solid glitter nails. The shimmer catches the light beautifully at evening events and in holiday photos.
For extra dimension, layer fine glitter over a darker green polish and add a tiny gold star at the top of each tree. A matte top coat on the non-glitter nails creates a lovely contrast, while a glossy finish keeps everything looking festive and fresh. This is one of the most joyful designs of the season.
3. Minimalist Tree Line Art
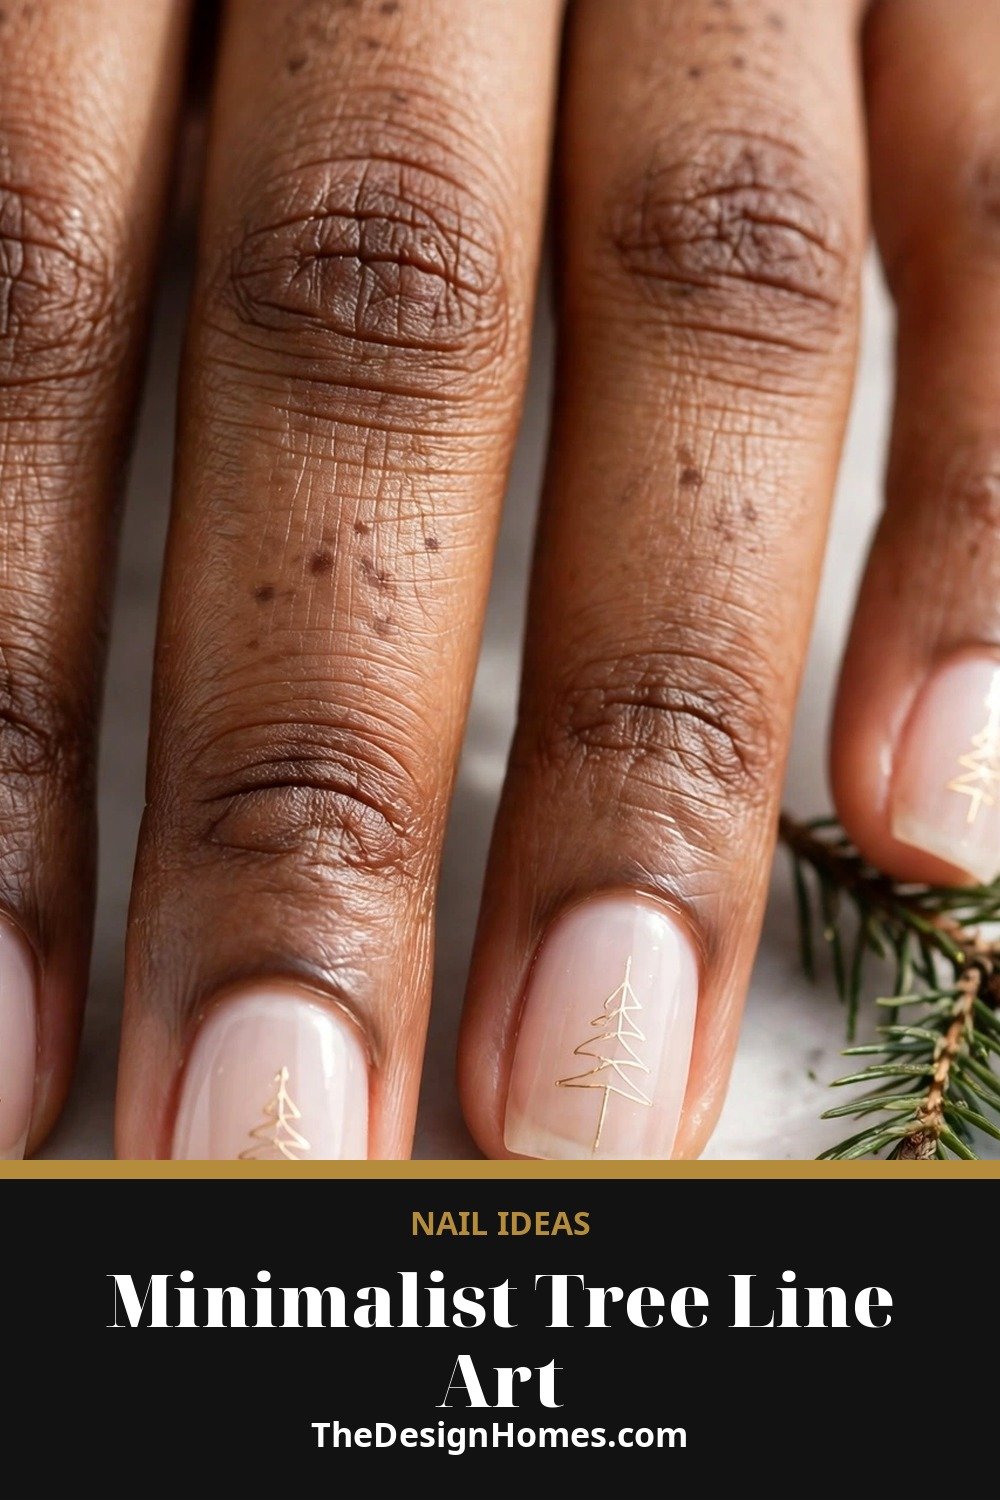
Minimalist tree line art is ideal for anyone who prefers clean, modern nails. A thin gold or black line forms a simple triangle tree on a sheer nude or milky white base, with a small dot or star to finish it. The design feels chic, understated, and surprisingly festive.
Because the art is so simple, it lasts well and grows out gracefully. Try the line tree on every nail for a uniform look, or place it on just two accent nails and keep the rest plain. It pairs wonderfully with gold jewellery and a neutral winter wardrobe.
4. Christmas Tree with Tiny Ornaments
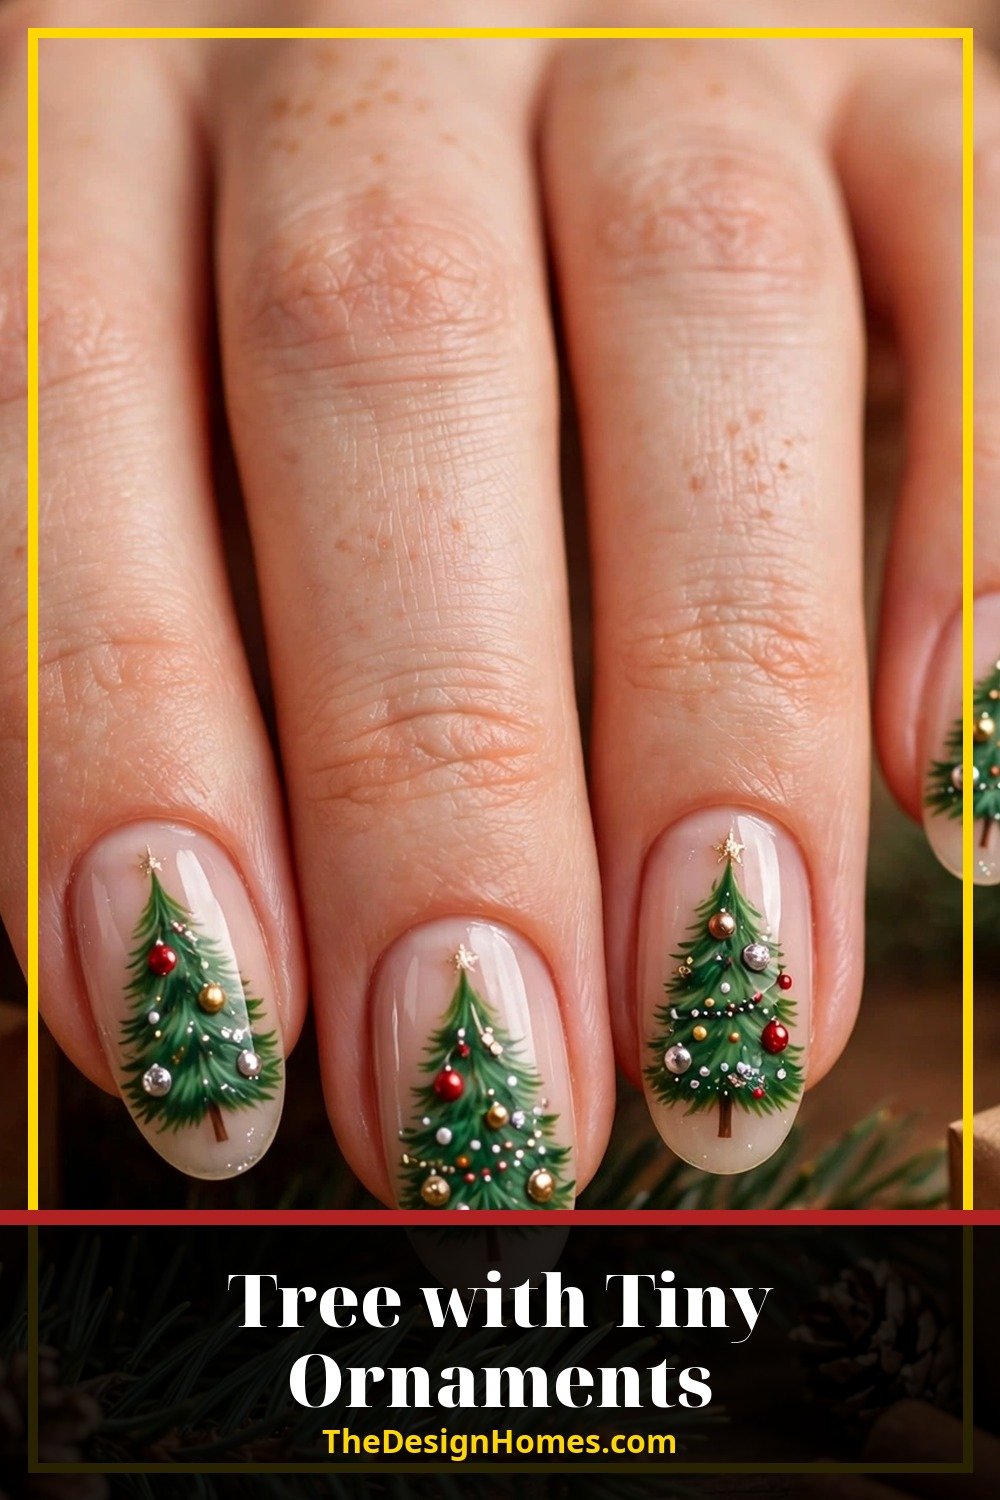
A Christmas tree decorated with tiny ornaments looks just like the tree in your living room, only smaller. Paint a full green tree on a neutral or deep red base, then add miniature baubles in red, gold, silver, and blue using a dotting tool. A few white dots can suggest snow or twinkling lights.
This design is playful and detailed, so take your time with the ornaments and keep them small for the best effect. It works especially well on almond or oval nails, where there is plenty of space for the tree. Seal it with a high-shine top coat to make the colours pop.
5. Snowy Christmas Tree Tips
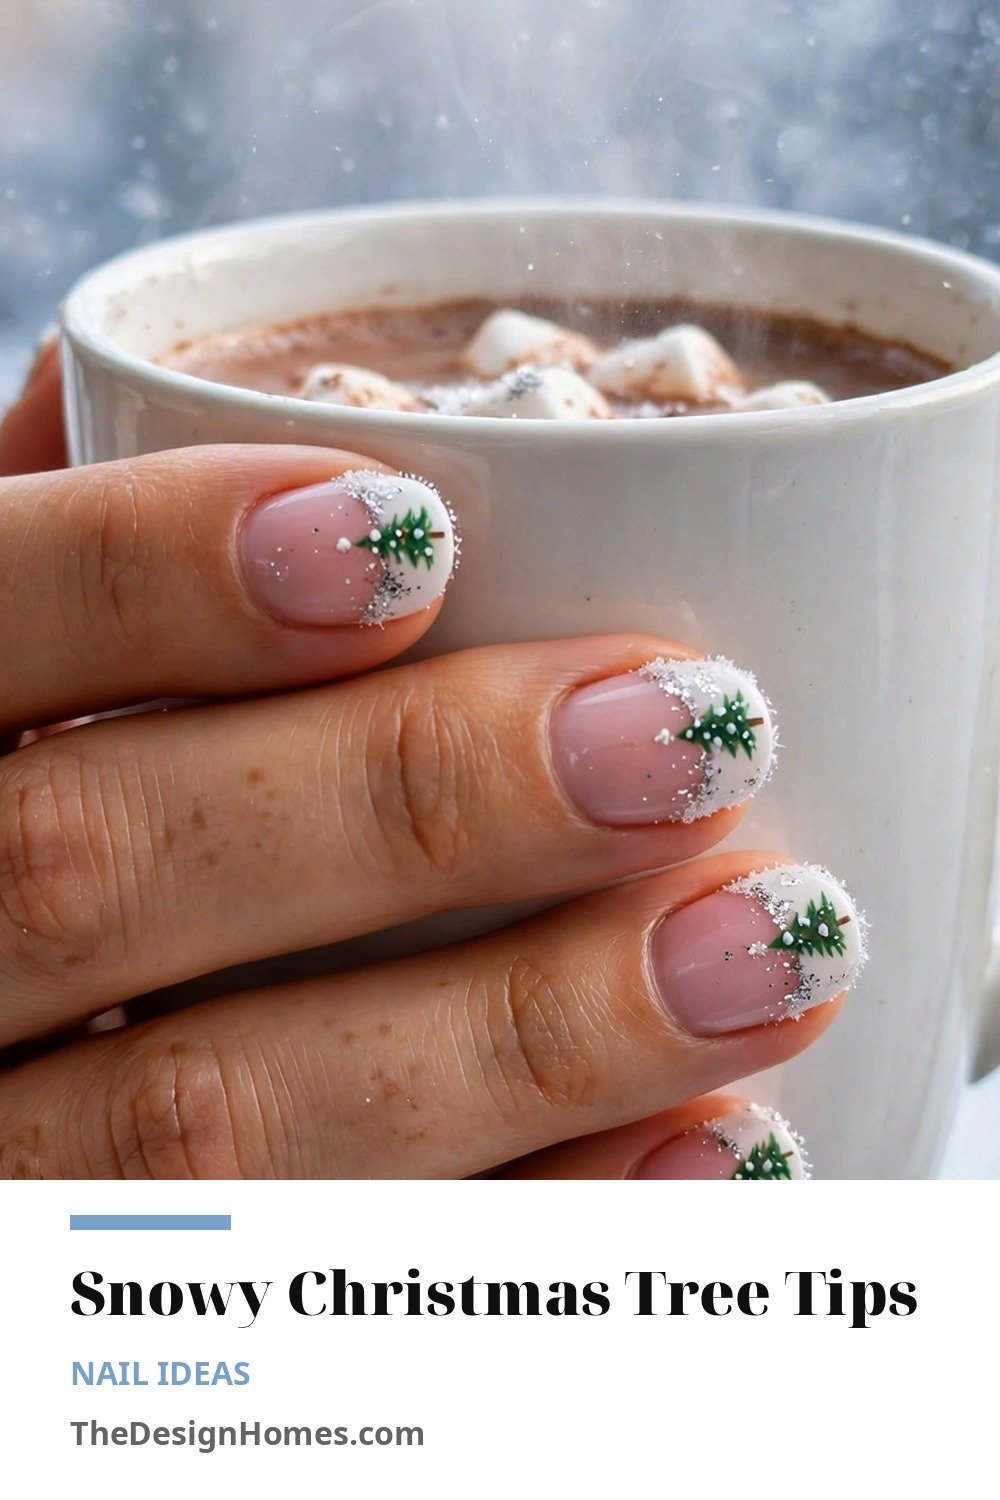
Snowy tree tips combine a classic French manicure with a wintry twist. Instead of plain white tips, paint a tiny green tree on each tip, or let white polish drip down like snow over a green tree design. The effect is fresh, pretty, and perfect for December.
Choose a soft pink or nude base so the snowy detail stands out, and add a touch of silver glitter for frost. This look suits short nails as well as long ones, and it feels elegant enough for work while still being clearly festive. It is a lovely choice for the whole holiday season.
6. Gold Christmas Tree Silhouette
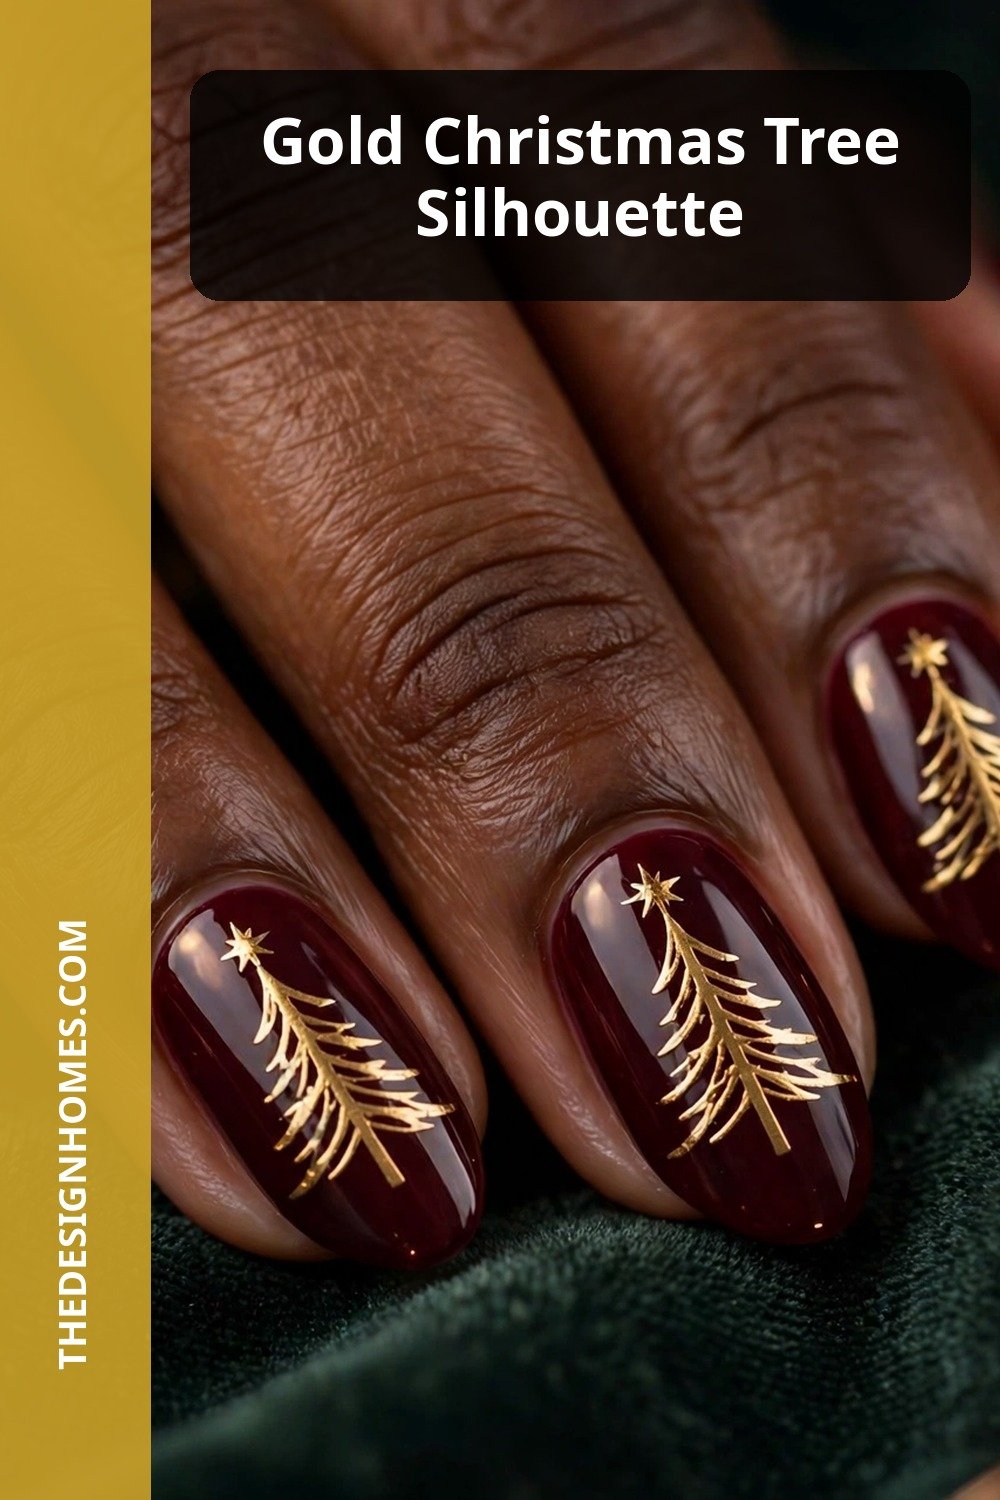
A gold tree silhouette on a dark background is pure holiday glamour. Paint your nails deep green, burgundy, or black, then add a metallic gold tree in the centre of each nail. The contrast is striking, and the metallic finish catches candlelight beautifully.
Keep the silhouette simple and bold, with a small star at the top and perhaps a thin gold line at the base to suggest the trunk. This design needs no extra decoration, which makes it quick to recreate and easy to wear. It is a favourite for Christmas parties and New Year celebrations alike.
7. A Christmas Tree on Every Nail
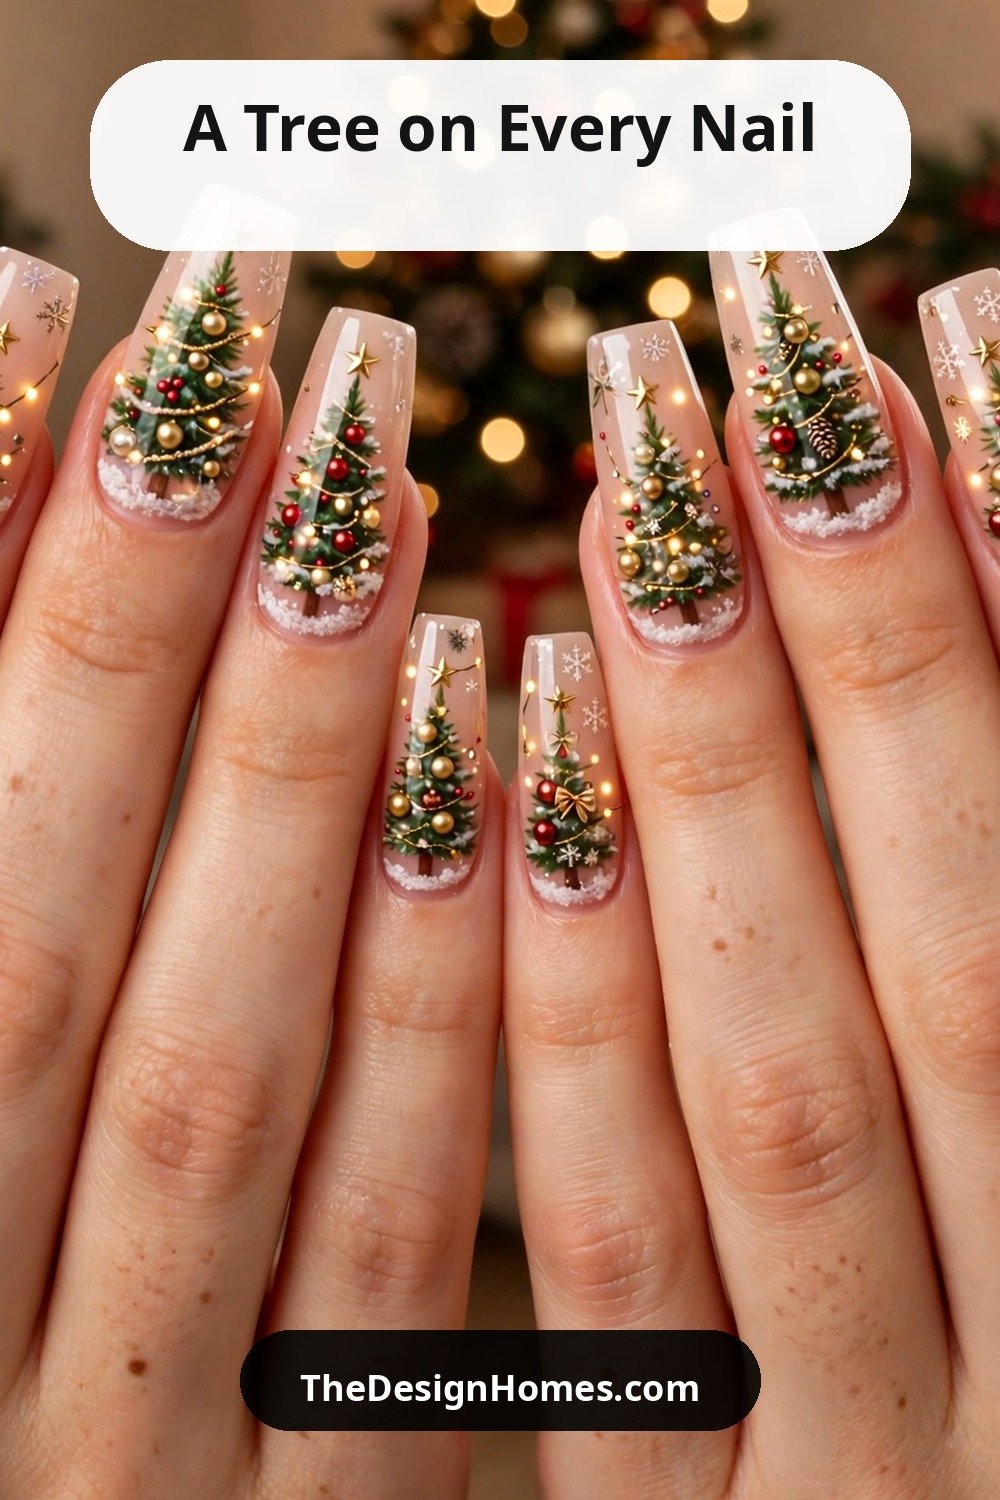
If you love a bold statement, put a Christmas tree on every single nail. Vary the design slightly from nail to nail — one tree with red baubles, one with gold, one with snow, one with lights — so the manicure feels like a collection rather than a repeat. A consistent base colour ties everything together.
This maximalist look is fun, festive, and guaranteed to start conversations. Use a nude or deep green base, and keep the trees roughly the same size for balance. Finish with a glossy top coat, and enjoy a manicure that is unmistakably Christmas from every angle.
8. Christmas Tree with a Star Topper
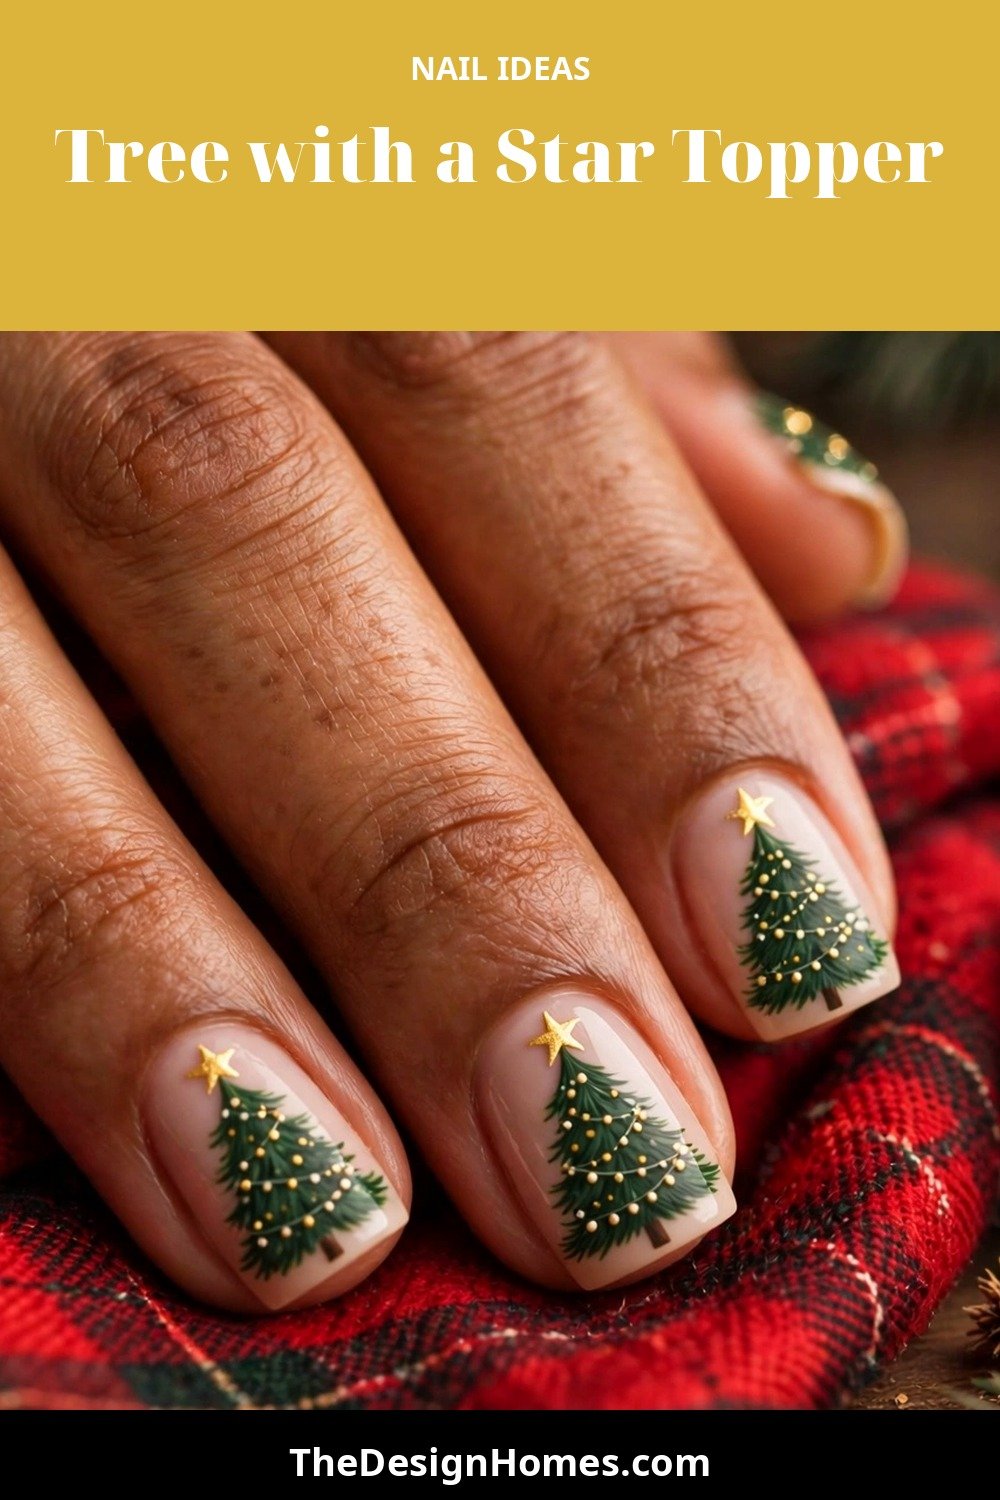
Every great Christmas tree needs a star, and this design makes the topper the hero. Paint a neat green tree on each nail, then crown it with a bright gold or silver star. Add a few tiny dots below the star to suggest lights or ornaments, keeping the rest of the design simple.
The star topper adds a touch of magic without overwhelming the nail. It looks lovely on a red, green, or nude base, and it photographs beautifully. For extra sparkle, use a metallic or glitter polish for the star itself, and let it be the brightest part of the design.
9. Christmas Tree with Fairy Lights
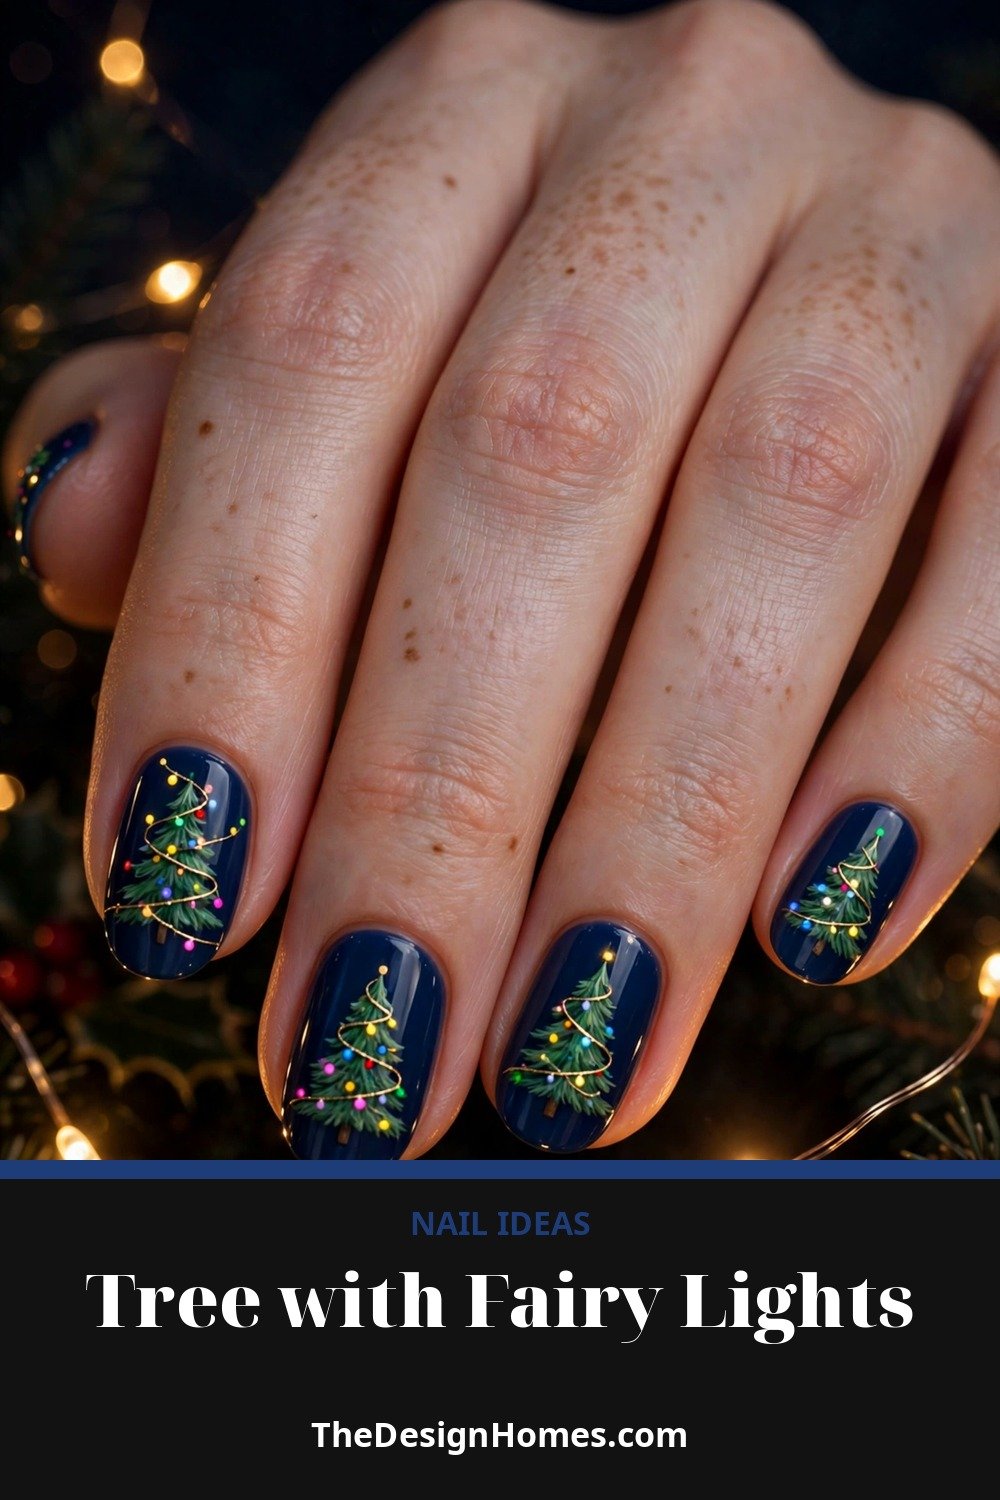
Fairy lights make a Christmas tree glow, and the same idea works wonderfully on nails. Paint a green tree, then wind a thin line of gold or silver across it and add tiny coloured dots along the line to look like lights. The result is warm, cosy, and full of festive charm.
Try this design on a deep navy or dark green base so the lights really stand out. A few extra dots scattered around the tree can suggest falling snow. This is a perfect evening look, especially when paired with a sparkly dress or a chunky knit jumper.
10. Christmas Tree on a Deep Red Base
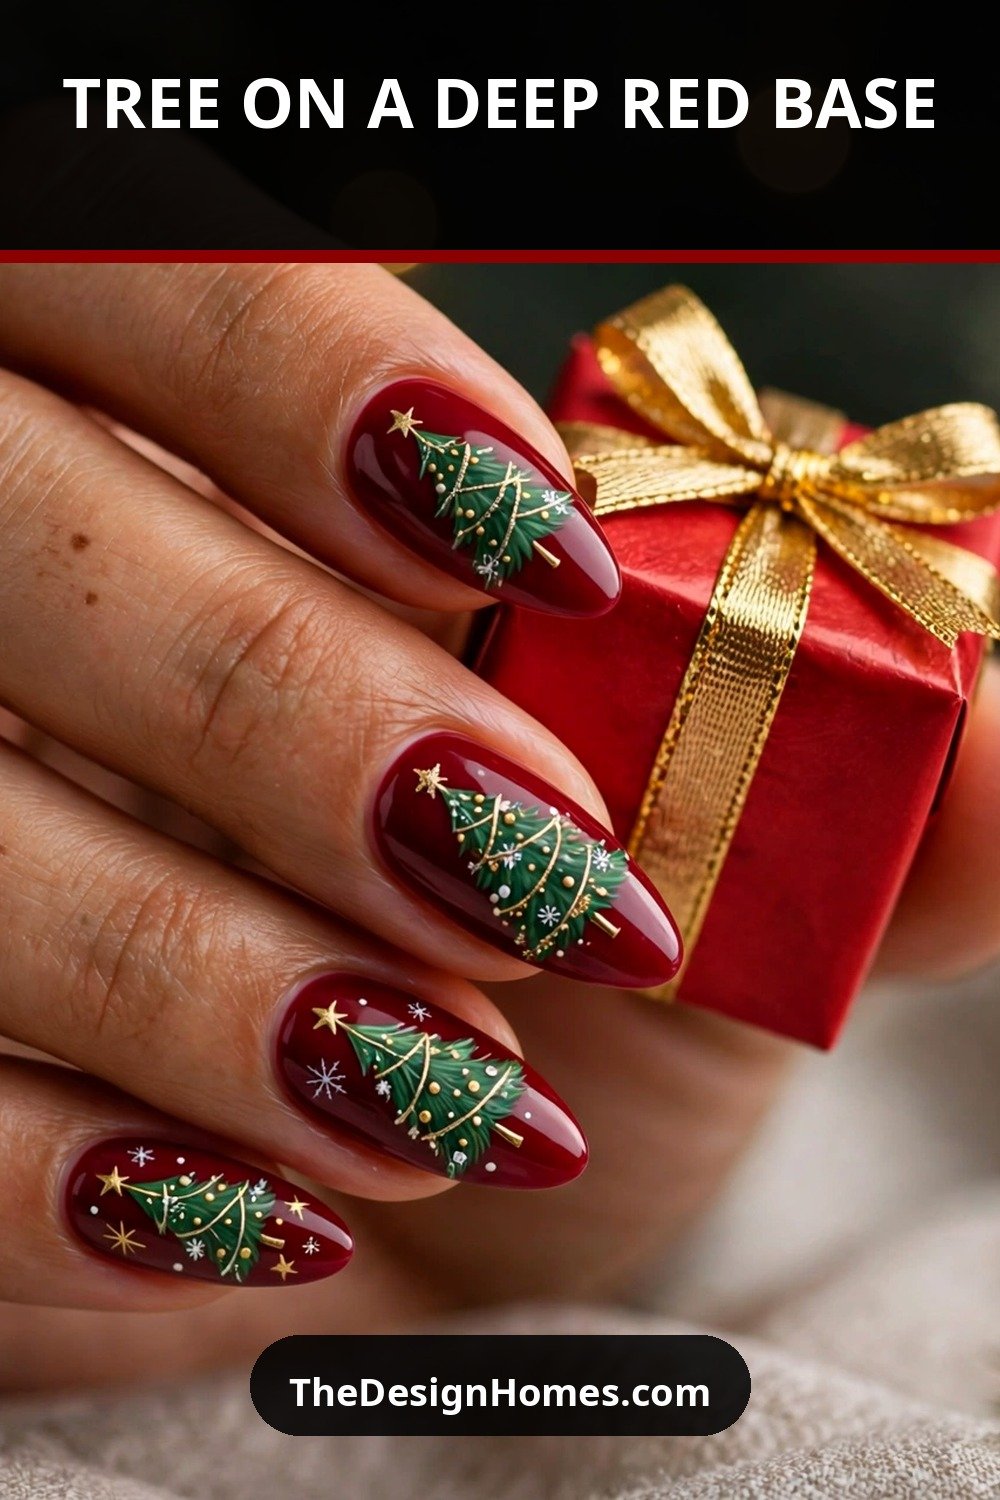
A deep red base gives Christmas tree nails a rich, classic feel. Paint your nails a luxurious cranberry or burgundy red, then add a green tree with gold and white details on top. The red and green combination is timeless, and the dark base makes the tree stand out beautifully.
This look works on every nail length and suits both glossy and matte finishes. Add a single gold star or a few tiny white dots for snow, and keep the tree design neat and centred. It is elegant, festive, and wonderfully easy to match with holiday outfits.
11. Watercolour Christmas Tree
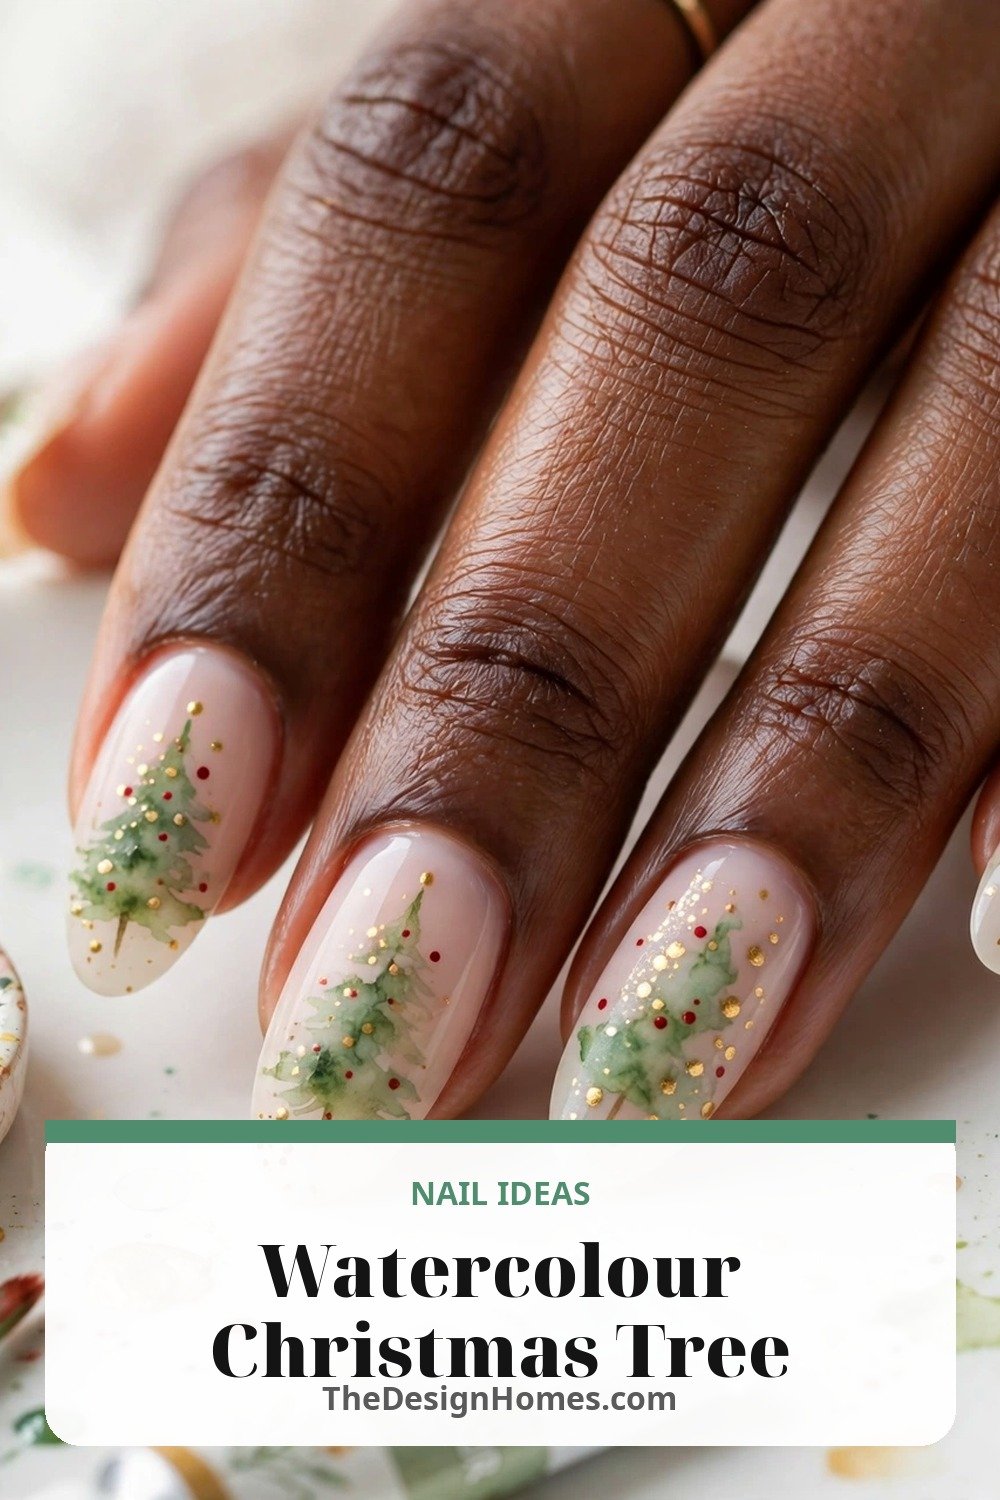
A watercolour tree feels soft, artistic, and a little bit dreamy. Use sheer washes of green polish, blended while still slightly wet, to create a tree with gentle, feathery edges. Add a few tiny dots in gold and red, and leave plenty of negative space around the design for an airy finish.
This style suits a pale nude, white, or soft grey base, and it looks beautiful on almond and oval nails. No two watercolour trees will ever look exactly alike, which makes each manicure feel unique. Seal it with a glossy top coat to protect the delicate blending.
12. Christmas Tree French Tips
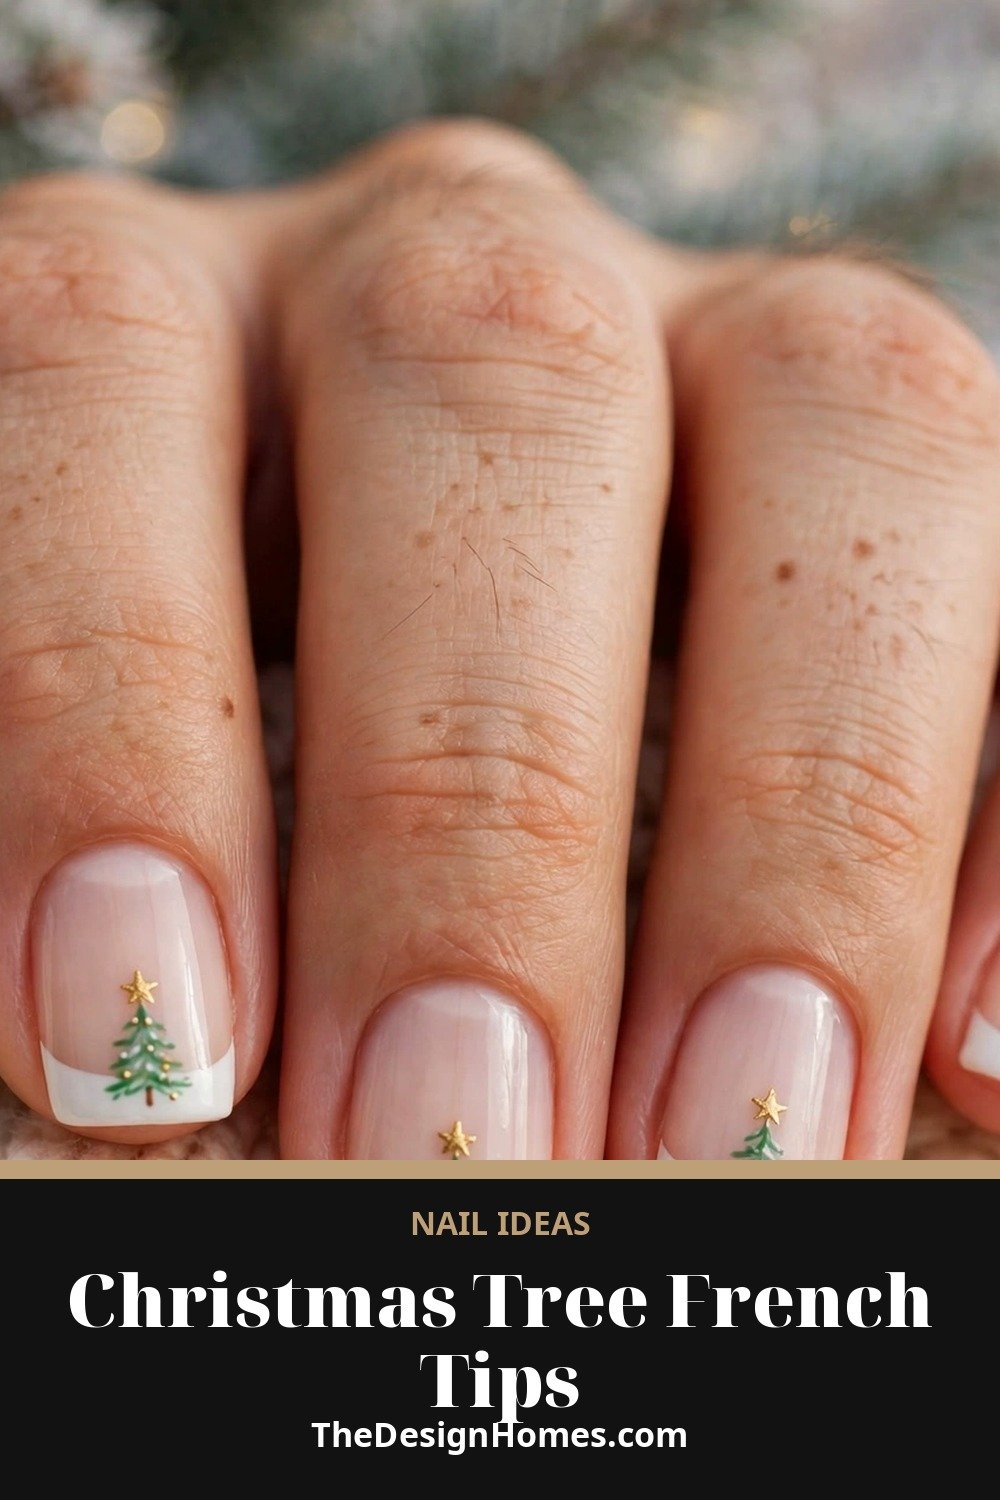
Christmas tree French tips are a clever twist on a timeless manicure. Instead of a straight white tip, shape the tip into a tiny tree, or paint a small green tree sitting right on the tip line. The rest of the nail stays sheer and natural, so the design feels light and wearable.
This look is ideal if you want festive nails that still feel refined. Try green trees with gold stars on a classic French base, or swap the white tip for glitter to add sparkle. It is a great choice for short nails, and it grows out gracefully over the holidays.
13. Christmas Tree and Presents
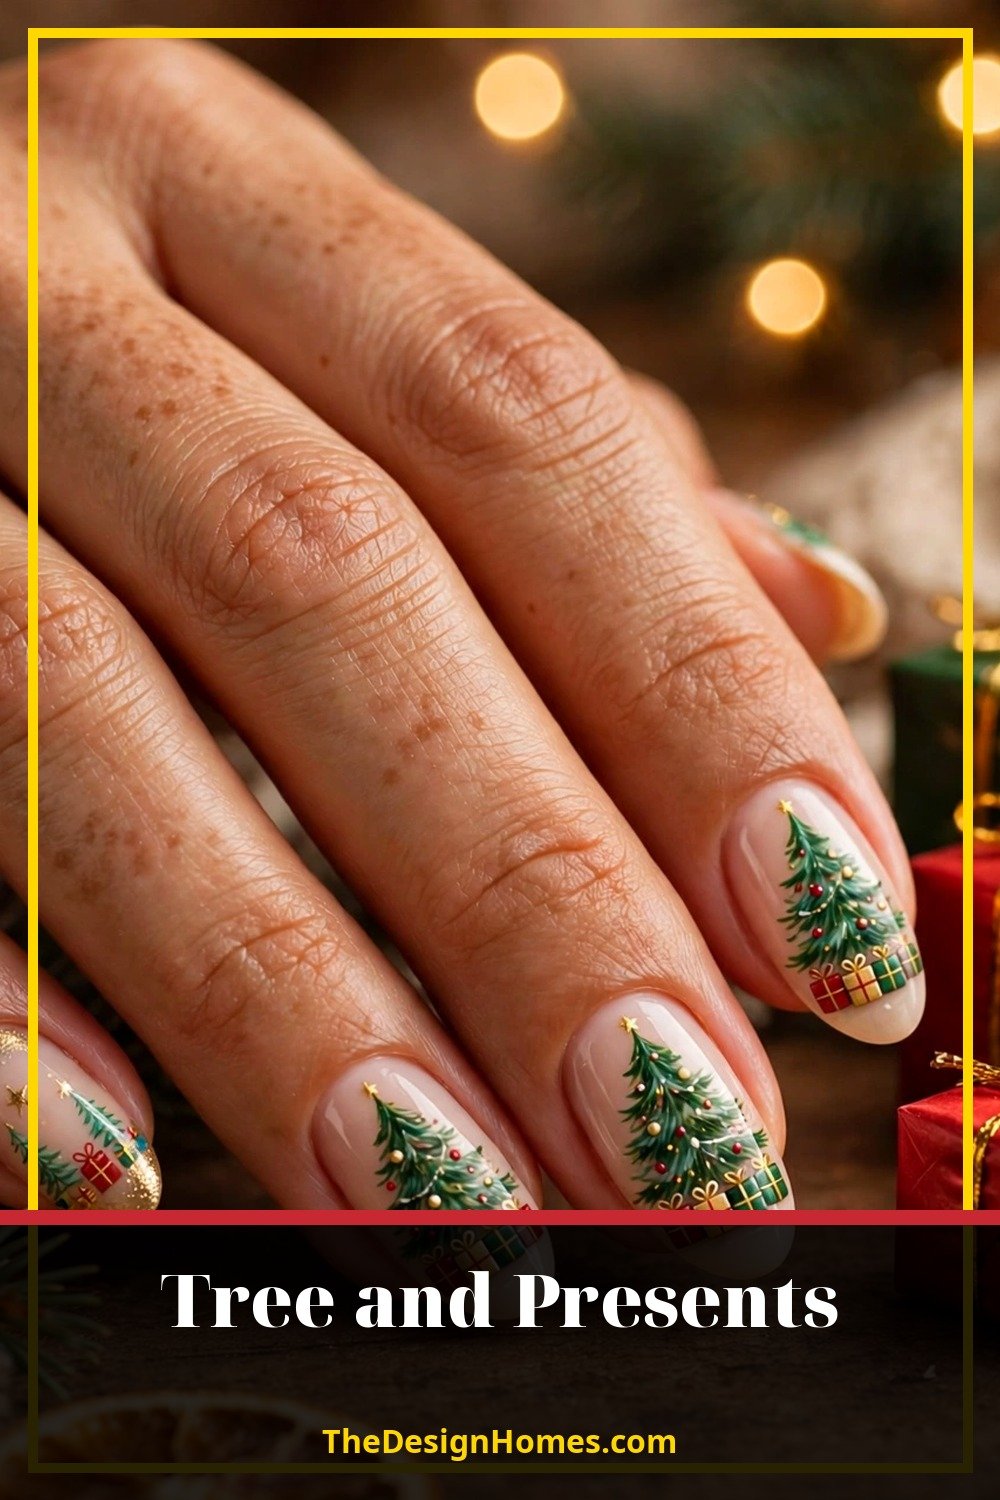
A tree with presents underneath tells a whole Christmas story on your nails. Paint a green tree on one or two nails, then add tiny wrapped gifts at the base using small squares of red, gold, and green polish with thin lines for ribbon. Keep the other nails simple with dots or stripes.
This design is cheerful and detailed, so it works best on medium or long nails where there is room for both the tree and the gifts. Use a nude or deep green base, and finish with a glossy top coat. It is a delightful choice for Christmas Day itself.
14. Frosted Christmas Tree
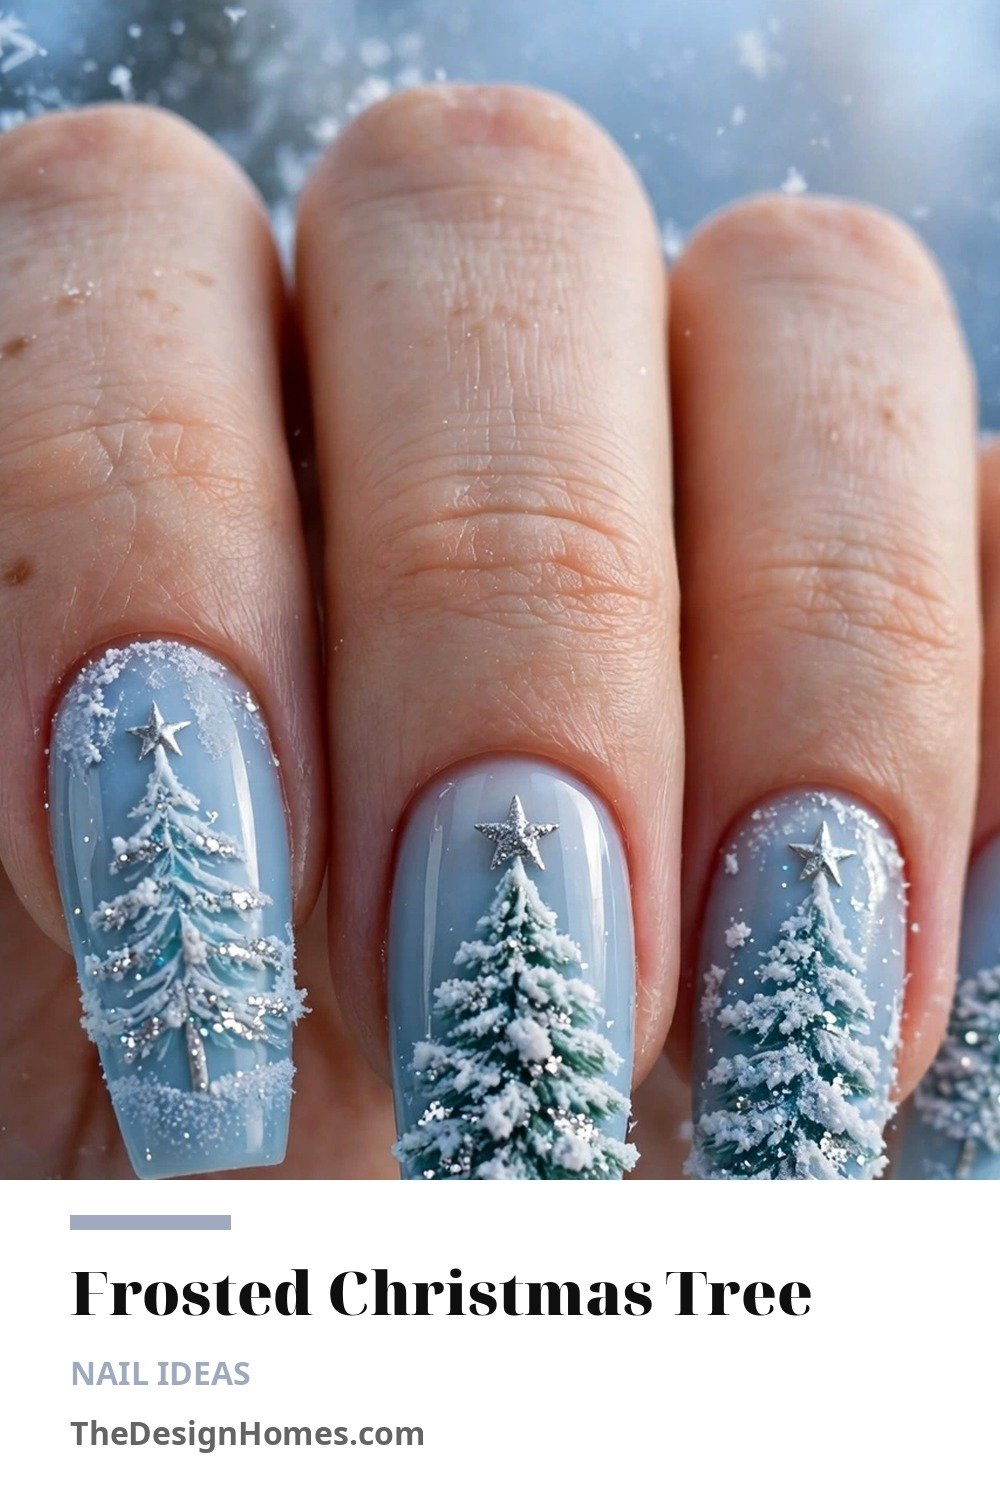
A frosted tree looks like it has just been dusted with fresh snow. Paint a green tree, then add white polish along the edges of the branches and a sprinkle of silver or white glitter on top. A matte top coat enhances the frosty, wintry feel, while a glossy one keeps the sparkle bright.
Pair the frosted tree with an icy blue, pale grey, or white base for a cool winter palette. This design feels calm and elegant, and it works beautifully from early December right through to New Year. Add a tiny silver star to complete the snowy scene.
15. Christmas Tree on Stiletto Nails
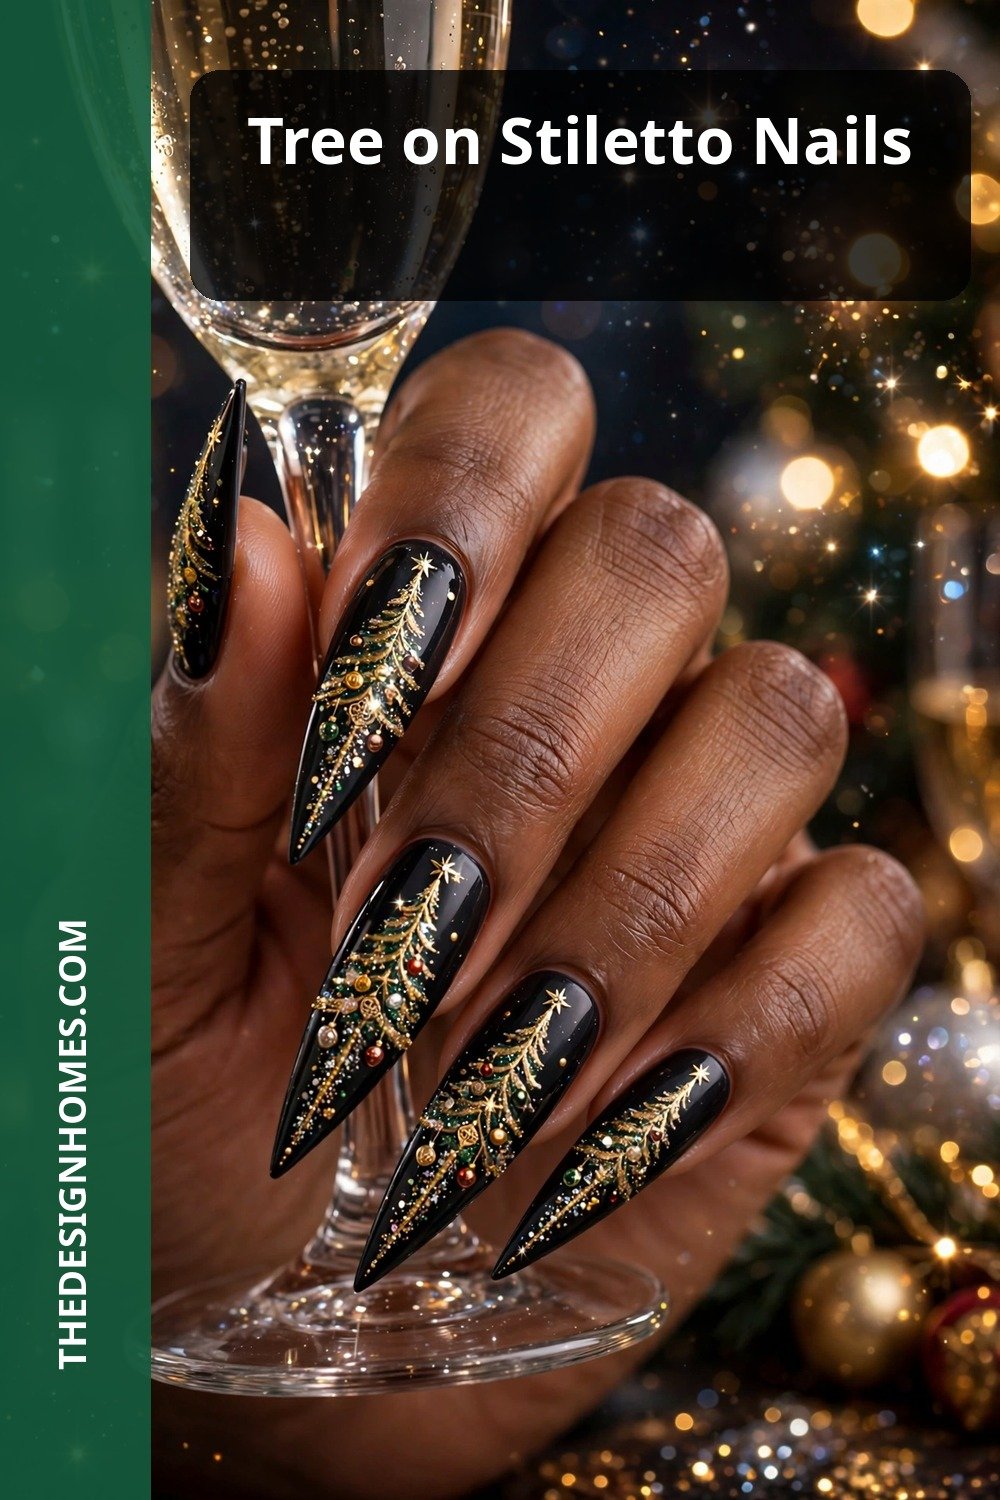
Stiletto nails give Christmas tree designs extra drama and space to shine. The long, pointed shape is perfect for a tall, elegant tree that runs the full length of the nail, decorated with tiny ornaments, glitter, and a sparkling star. Deep green, black, or burgundy bases all look stunning here.
Because stiletto nails are bold on their own, keep the tree design neat and balanced so it does not feel crowded. Try the full tree on two accent nails and simpler glitter or solid colours on the rest. The result is glamorous, festive, and unforgettable at any holiday party.
Conclusion
Christmas tree nails are a joyful way to celebrate the season, and there is truly a design for everyone. From a tiny tree on a single accent nail to a frosted stiletto showstopper, each of these fifteen ideas can be adapted to your nail length, your favourite colours, and your personal style. The key is to keep the tree neat, the colours balanced, and the finish glossy and protected.
Try one design this week, then experiment with another as Christmas approaches. Whether you paint them yourself or take inspiration to your nail technician, these festive trees will keep your manicure merry, bright, and full of holiday spirit all season long.
Frequently Asked Questions
What base colour works best for Christmas tree nails?
A nude, deep red, dark green, or navy base all work beautifully, depending on the look you want. Nude keeps the design soft and subtle, while dark red or green makes the tree stand out boldly. Choose a base that complements your skin tone and your holiday outfits.
Can I do Christmas tree nails on short nails?
Yes, absolutely. Tiny trees, minimalist line art, and snowy tips all look lovely on short nails. Keep the tree small and simple, use a fine brush or dotting tool, and focus the design on one or two accent nails if space is limited.
How do I make my Christmas tree nail art last longer?
Start with a good base coat, let each layer dry fully before adding the next, and finish with two coats of a high-quality top coat. Avoid hot water for the first few hours, wear gloves for cleaning, and reapply top coat every two or three days to prevent chipping.
What tools do I need for Christmas tree nail art at home?
A fine detail brush, a dotting tool, and a toothpick will cover most designs. You will also need green, gold, red, and white polish, plus a base coat and top coat. Nail stickers or stencils can help if you are new to freehand painting.
When should I wear Christmas tree nails?
Christmas tree nails are perfect from late November through to New Year, and they suit parties, family gatherings, work events, and Christmas Day itself. Choose a subtle design for everyday wear and a bolder glitter or stiletto look for special celebrations.